Dyeing clothes
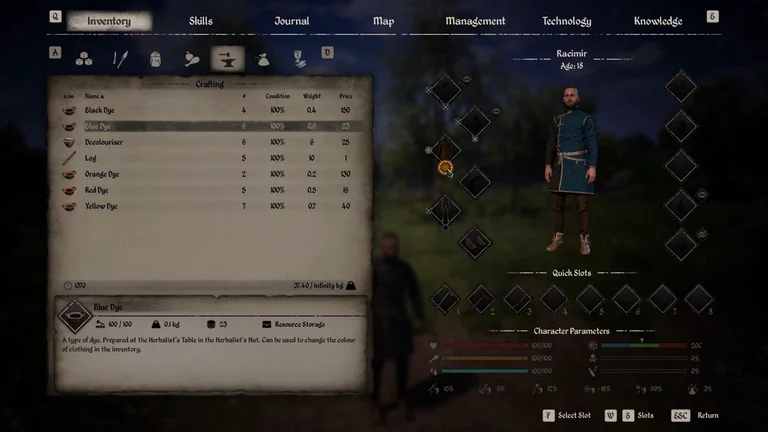
Equip the garment, select a dye in Inventory and choose a colour slot. Use Decolouriser to restore the original colour. Check the recipes and merchants for each dye.
Apply or remove a colour
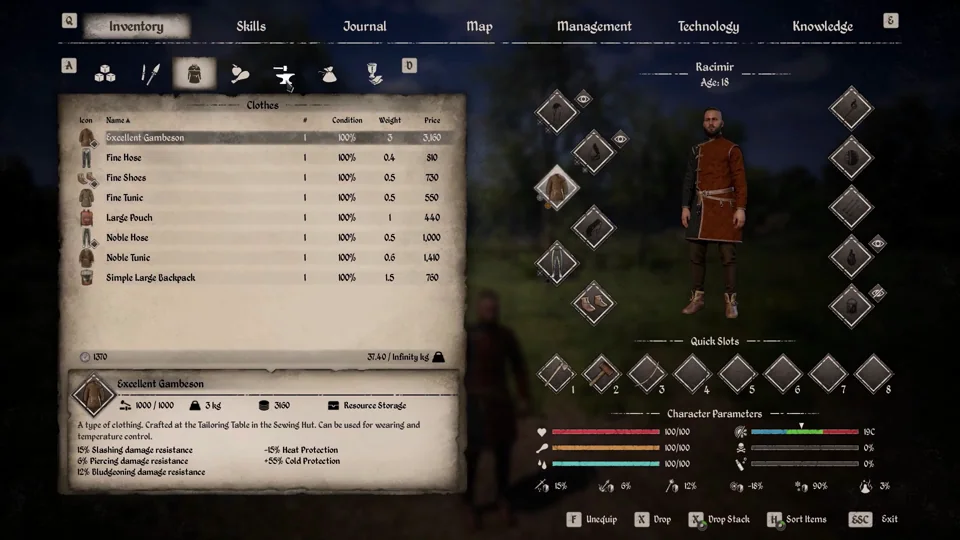
The tutorial shows two colour zones on the Excellent Gambeson. Check which slots are available on the garment you are wearing.
| Action | What to do |
|---|---|
| Apply a dye | Equip the garment, select the dye in Inventory, choose Dye, then select and confirm a colour slot. |
| Change garments | When Racimir replaces the Noble Tunic with the Excellent Gambeson, the black and orange zones carry over to the new garment. |
| Remove a colour | Select Decolouriser and confirm the zone to clear. Repeat for the other colour if both zones are dyed. |
Colour zones shown on three garments
The scene shows the colours visible when switching garments. The maximum number of slots for the Fine Tunic and whether dyes persist after reloading remain unverified.
| Garment | What the tutorial shows |
|---|---|
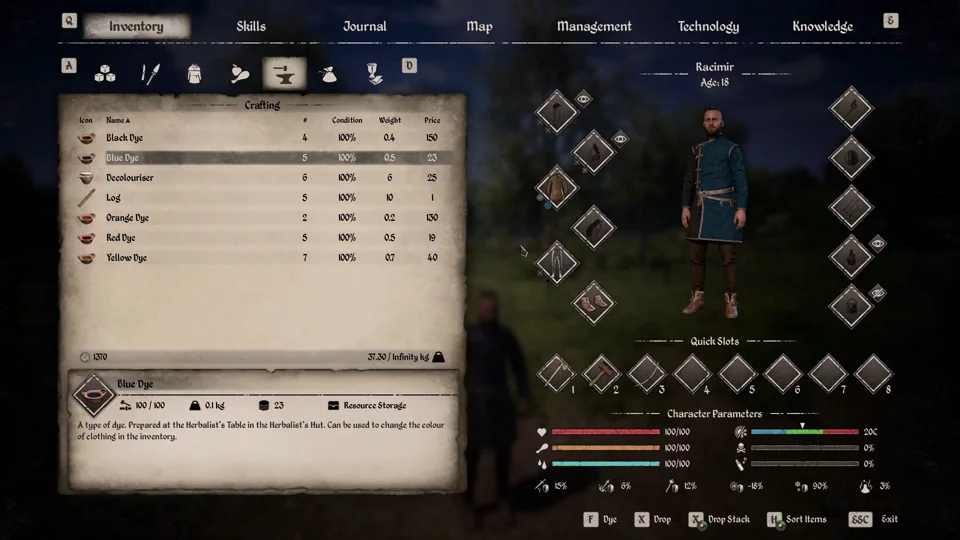
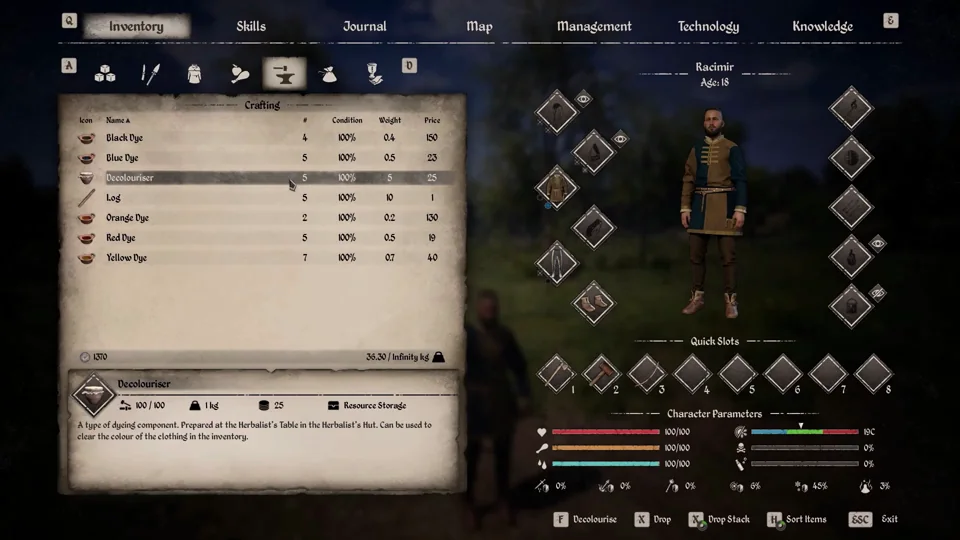
| Noble Tunic | Two zones. Initially orange and black, later blue and black after re-equipping it. |
| Fine Tunic | One orange zone is visible after equipping it. |
| Excellent Gambeson | Two zones. The orange zone is replaced with blue while the black zone stays visible. |
Change orange to blue on the Excellent Gambeson
| Recipe and materials | What you see |
|---|---|
| Blue Dye | After confirmation, the orange cloth becomes blue. The dark area stays visible and the dye stack goes from 6 to 5. |
Clear both colours from the Noble Tunic
| Recipe and materials | What you see |
|---|---|
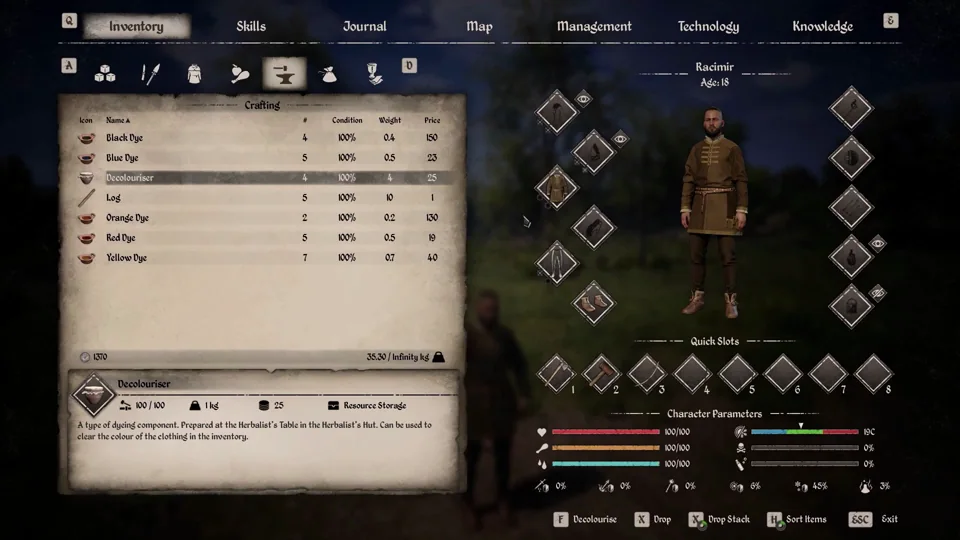
| Decolouriser | Clear each area in turn. The first use leaves the sleeves blue and 5 units. The second restores the original colours and leaves 4 units. |
Units used in the tutorial
The clip shows one unit per confirmed colour application and two Decolouriser units to clear two zones.
| Item | Before | After |
|---|---|---|
| Black Dye | 5 | 4 |
| Orange Dye | 3 | 2 |
| Blue Dye | 6 | 5 |
| Decolouriser | 6 | 4 |
Dye and Decolouriser recipes
The PC tutorial shows preparations at the Herbalist’s Table. The threshold column gives the technology for each scheme.
| Item and merchants | Technology threshold | Scheme cost (coins) | Ingredients per unit |
|---|---|---|---|
| Blue Dye | 100 · Survival | 250 | 50 × Berry, 1 × Clay Bowl |
| Decolouriser | 100 · Survival | 250 | 1 × Bucket of Water, 10 × Ash, 1 × Clay Vase |
| Red Dye | 100 · Survival | 250 | 10 × Clay, 1 × Clay Bowl |
| Yellow Dye | 100 · Survival | 250 | 10 × Onion, 1 × Clay Bowl |
| Green Dye | 2,500 · Survival | 550 | 1 × Blue Dye, 1 × Yellow Dye |
| Orange Dye | 2,500 · Survival | 550 | 1 × Yellow Dye, 1 × Red Dye |
| Violet Dye | 2,500 · Survival | 550 | 2 × Blue Dye, 2 × Red Dye |
| Black Dye | 7,500 · Production | 1,500 | 40 × Spruce Bark, 3 × Iron Ore, 1 × Clay Bowl |
Materials for mixed dyes
Start without any premade dye. The scheme price counts each base dye and mixture once. If you also make the bowls, their scheme costs 300 coins separately.
| Output | Using bowls you have | If you also craft the bowls | Dye schemes (coins) |
|---|---|---|---|
| Green Dye | 50 × Berry, 2 × Clay Bowl, 10 × Onion | 50 × Berry, 4 × Clay, 10 × Onion | 1,050 |
| Orange Dye | 10 × Clay, 2 × Clay Bowl, 10 × Onion | 14 × Clay, 10 × Onion | 1,050 |
| Violet Dye | 100 × Berry, 20 × Clay, 4 × Clay Bowl | 100 × Berry, 28 × Clay | 1,050 |
| One of each mixed dye | 150 × Berry, 30 × Clay, 8 × Clay Bowl, 20 × Onion | 150 × Berry, 46 × Clay, 20 × Onion | 2,400 |
Related references
Potions and dyes at the Herbalist’s Table
See the selected colour slot
Sources
Sources and version information at the end of this page
- Distributed PC dyeing tutorial · colour slots, outfit changes and protection values · Steam build 26431490
- DT_ListOfItems · Steam PC 2.7.0.5
- DT_CraftingRecipes and DT_CraftingCategories · Steam PC 2.7.0.5
- Merchant and resident tables · Steam PC 2.7.0.5